“In the Grand Canyon, Arizona has a natural wonder which is in kind absolutely unparalleled throughout the rest of the world.”
— President Theodore Roosevelt
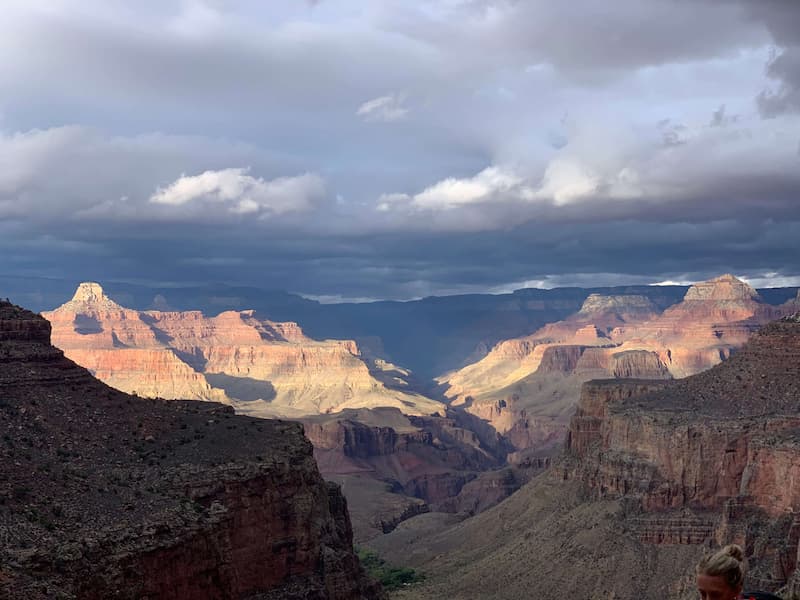
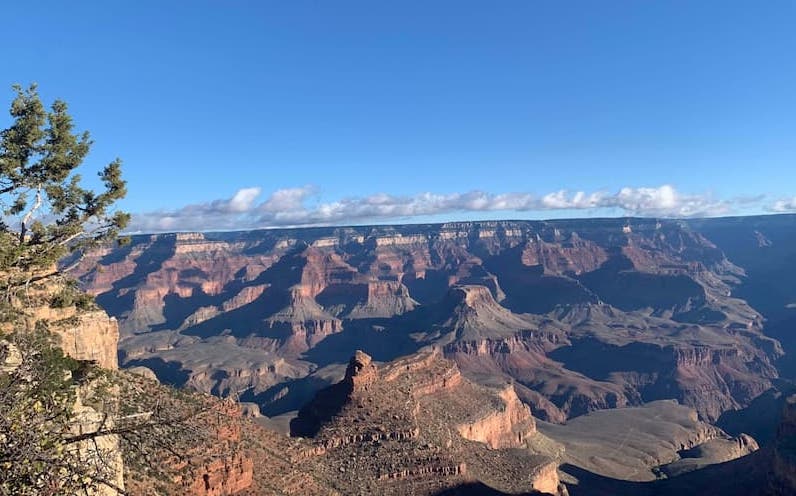
In the early nineties, when I was new to this country, a trip to Grand canyon was one of the very first road trips that we took. I had no clue of what it was and there was no access to internet back then to do a quick search beforehand to see what we were about to witness. On a cold December morning, we bundled up in the car and drove to the South Rim from our lodge to see the sun rise above the canyon. That was my first sight of the wondrous Grand Canyon and I was simply blown away from seeing the enormity of what laid ahead of me. It was absolutely breathtaking and purely beyond my imagination, something that got etched in my memory forever.
We went on a short hike down the Bright Angel Trail but being new to hiking then, I barely had the stamina to go beyond the first mile. We turned back vowing one day we should go again to hike down into the belly of the canyon and back. That day came to reality after all these years when my son and I recently hiked from North Rim to South Rim of the Grand Canyon popularly known as the R2R hike.
About the R2R trail
The R2R hike
Planning the trip
Training for the hike
Gear and what to bring
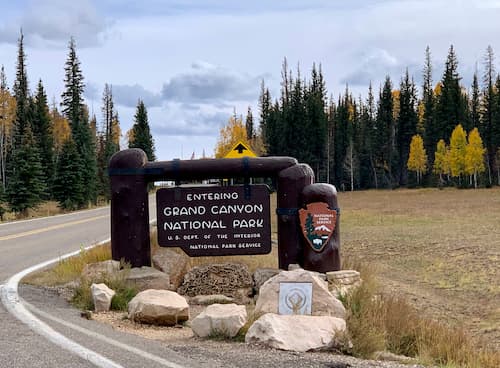
About the R2R trail
There are a few different options to hike through the canyon: Going from North to South rim and vice versa. In the South rim, one can choose between South Kaibab and Bright Angel trails. It can be done as a day hike or as a backpacking trip over two or more days. We chose to hike from North Rim to South Rim via Bright Angel trail on a single day which is one of the popular rim to rim options and the details below are specific to this option.
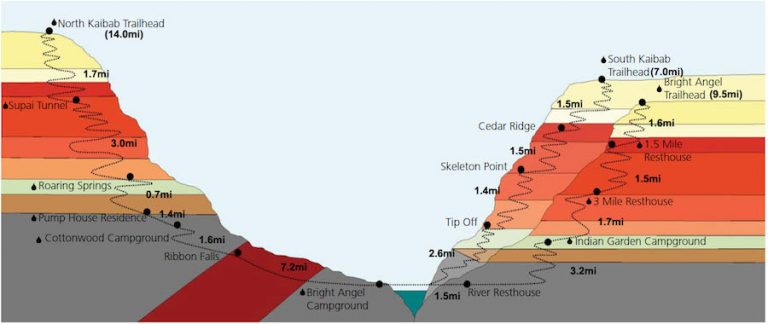
Trail: North Kaibab Trail -> Phantom Ranch/Colarado river -> Bright Angel Trail
Total distance: 23.9 miles
Average time to hike: 12 hours
Elevation gain from the river: 5781 ft to North Rim via North Kaibab trail and 4400 ft to South Rim via Bright Angel trail
Difficulty: Strenuous
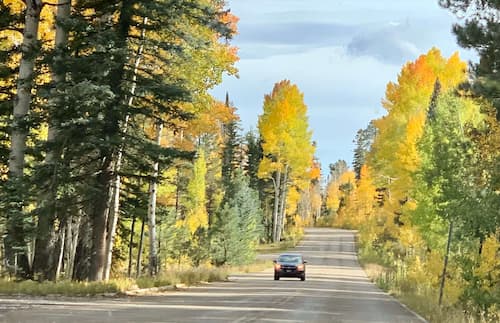
The NPS services like water and restrooms are available between mid-May and mid-October and that is generally the recommended time to do this hike. The North Rim facilities close around mid-October as well. But hiking can still be done from North Rim as long as the roads are open and free of snow. It gets extremely hot during the summer months and cools down a bit in spring and fall with May and October being the most popular months that draws a lot of crowd.
The R2R hike
We decided to get a head start at 4:30 am and aimed to finish the hike by 6:00 pm. The morning temperatures at North Kaibab trailhead which is about couple of miles from Grand Canyon Lodge was in the 40s. We bundled ourselves up in layers of clothing and accessories anticipating the varying temperatures inside the canyon over the day. We started the hike down the rocky trail blanketed by the dark starlit sky. This is something unique about this hike where we get to climb down first.
We moved at a slower pace than we thought that we would for about an hour and a half in the darkness leading to twilight until we reached the first restroom/water refill stop at Supai tunnel. We took a 15 minute break and decided to do so at every breakpoint along the trail. Soon dawn started to paint the horizon in shades of different colors and we crossed the very first bridge out of many that followed.
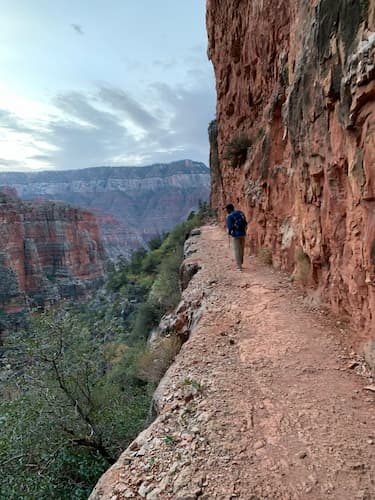
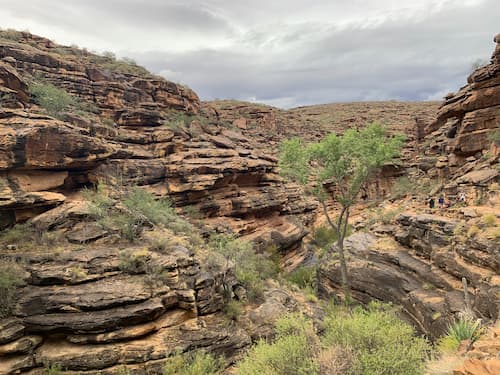
The canyon walls and deep interiors in radiant hues were absolutely mesmerizing and we were glad we started the hike at the North Rim. The sheer beauty of the canyon was further enhanced by the splash of Fall colors.
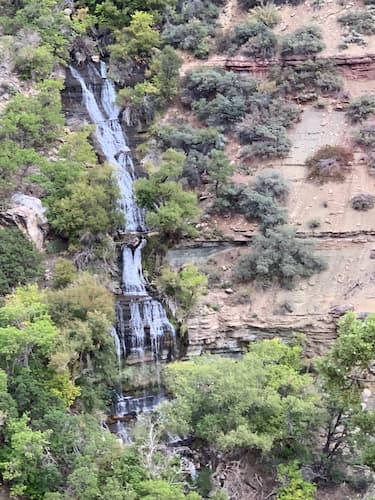
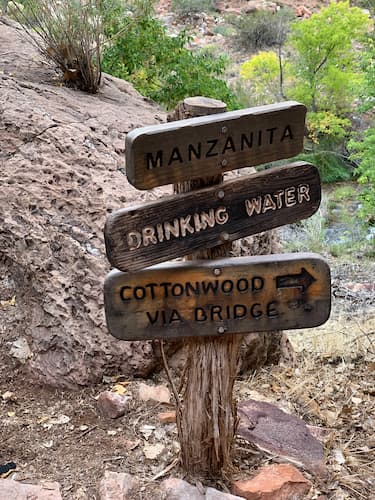
Passing through Roaring Springs with a view of the waterfalls not accessible from the trail, we soon reached Manzanita rest area, a popular one to rest before heading down to Cottonwood campground at 7 miles. The trail flattened out a bit giving a breather to constant downhill pounding and snaked right next to Bright Angel Creek strewn with colorful rocks. There is an option to take a trail to go visit the Ribbon Falls if you don’t mind wading through the stream to get to the other side.
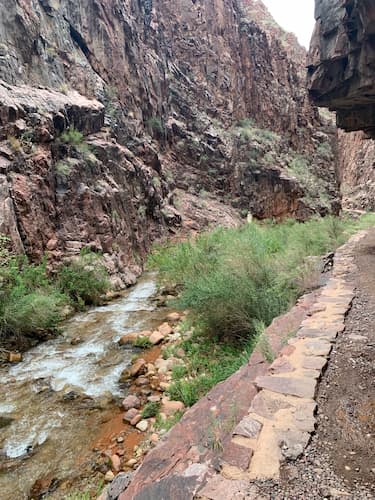
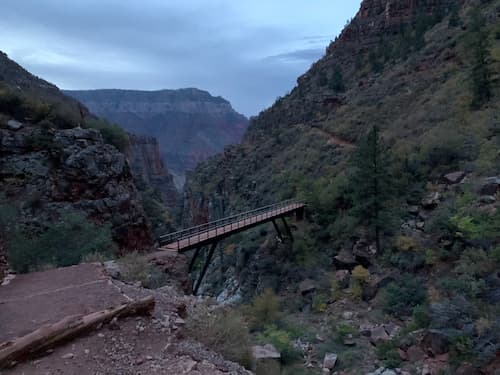
Next part of the hike took us into the much dreaded “Box” where the canyon walls soared high into the sky trapping the heat making it the warmer part of the trail. Undoubtedly this is one of the most beautiful segments of the trail as well and lasted for about four miles with many bridges criss-crossing the Bright Angel creek. It seemed never-ending and fatigued by this time, we took more frequent breaks all the while hydrating ourselves with enough electrolytes.

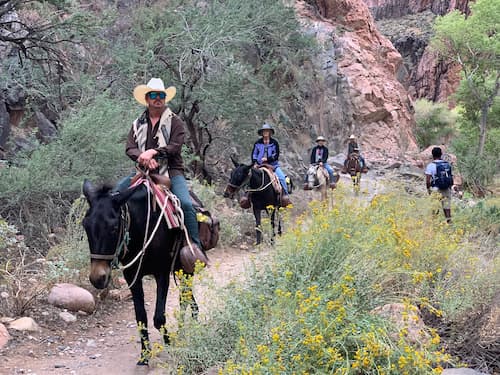
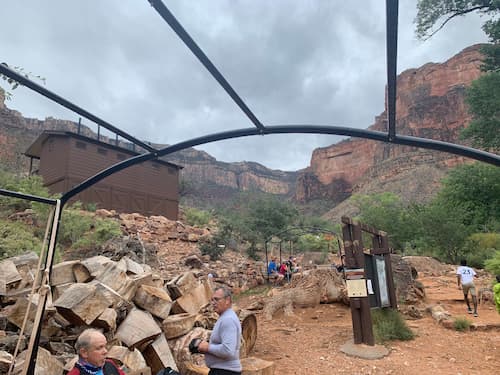
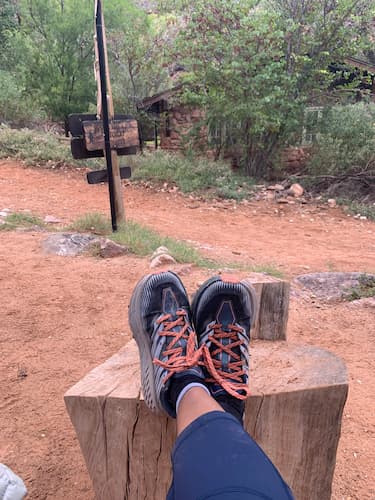
Couple of hours later, we exited into the popular Phantom Ranch area with their highly sought after cabins and a small store that sells the famous lemonade and a few other goodies. With easy access to Bright Angel Creek, we took about an hour break and had lunch at the same time soaking our feet in the creek right next to the Bright Angel campground. It felt so good after the somewhat brutal descent of about 6000 ft down into the canyon! We ran into a mule train when we were above to leave.
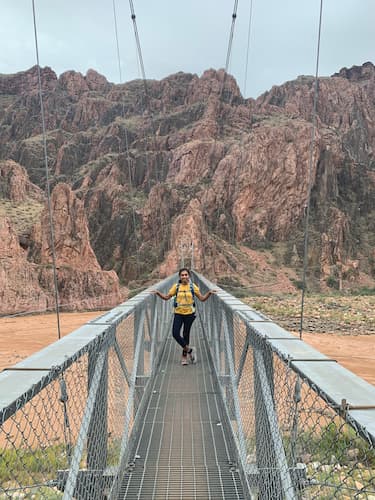
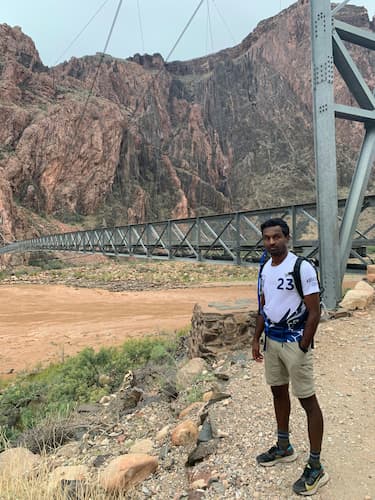
With newly gained energy post lunch, we continued our hike towards the South Rim crossing the Silver Bridge suspended over the mighty Colorado river with visible rapids. At the end of the bridge the trail splits into two, South Kaibab trail and Bright Angel trail. We took the Bright Angel trail where the trail became sandy which provided some much needed comfort to our feet after hiking for 14 miles. The next couple of miles adjacent to Colorado river was pretty flat.
Then we began the climb out of the canyon starting with the tight switchbacks called Devil’s Corkscrew and I really enjoyed this part of the hike after all the descending. The views of the canyon started to change dramatically with more wider views of the massive towering cliffs. The scenery around us started to change as well as we crossed puddles of water on the trail and noticed more trees along the way as we reached the next stop, Indian Garden campground, midpoint between the south rim and the river. We were impressed with our pace as we quickly gained elevation.
The Indian Garden rest area, an oasis of greenery was fairly big with benches and tree stumps to rest and we had a wonderful chat with fellow hikers and trail runners some of whom were doing R2R2R! Here we ran into hikers who started their hikes from the South Rim unlike us. We had 4.5 miles left and made up our mind mentally to trudge the steepest section of the trail with the last 3 miles from 3-mile rest stop covering over 3000 ft of elevation. Surprisingly we still were able to maintain the same pace and the geological formations like the billion year old dark colored Vishnu Schist kept us fascinated on how the canyon evolved over time.
We continued to watch the amount of calories to consume to help with the steep climb at the same time keeping a tab on the hydration. We arrived at the 1.5 mile rest stop, the last one, at around 5:00 pm. We took more frequent breaks from then on to enjoy some of the awe-inspiring views with the colors changing by the minute which none of the cameras could capture. It truly wasn’t easy to just walk by without admiring what laid ahead of us.
Finally it was time to give the final push through the two last and longer switchbacks to get us out of the canyon and I got teary-eyed when we crossed the last tunnel closer to the trailhead. The minute we exited the canyon was definitely a moment to cherish and it was nice to see the crowd waiting at the rim for their loved ones cheer for us also.
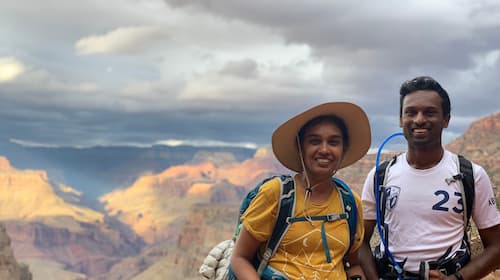
From the rim, I fondly remembered the day when I first saw the canyon many years ago, when my son wasn’t even born and fast forward to the present, felt so thrilled and thankful for having done the hike of my lifetime with him as my hiking buddy who gave me a wonderful company every step of the way!
Planning the trip
More than training for the hike itself, there is considerable amount of planning that needs to be done much in advance with respect to travel and accommodations to do this hike. The following are some we looked into to plan our trip.
Nearby airports: Las Vegas, Phoenix, Flagstaff
Shuttles from airports: Grand Canyon Shuttles (driving is an alternative)
To shuttle between rims: Trans Canyon Shuttle
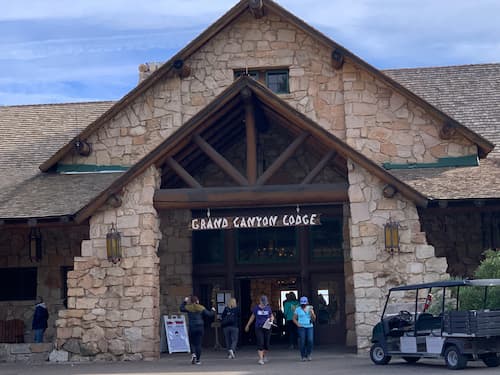
Lodging in North Rim: Grand Canyon Lodge (this is the only lodge in the North rim)
Lodging in South Rim: Grand Canyon lodges of the South rim
If you plan to do the hike over two or more days, then you need to secure in advance permit to stay in Phantom Ranch or backcountry permits to camp in one of the campgrounds below the rim. No permits are required to do a day hike.
We flew in to Flagstaff and shuttled to the rim and back as it worked out best for us. Each option comes with its pros and cons. You may have to do some research around it.
There are FaceBook groups that we joined and found it useful especially as we came closer to the date of the hike in knowing about the weather, trail conditions, etc.
Training for the hike
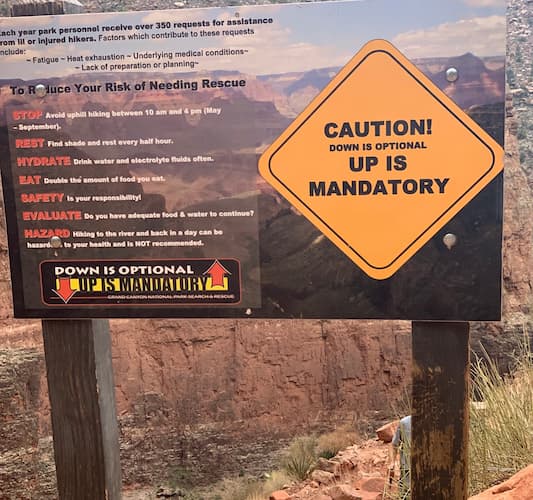
This is a long strenuous hike and needs to be undertaken with proper training. The park has warning signs in many places for the right reason. Here are some that would help with your planning.
Cardio – Running, jogging, swimming, biking – doing any of these for months at least three times a week to gain endurance
Strengthening – Squats, lunges, planks, etc. – you would need a lot of leg strength for this hike as you descend for 14 miles. A good total body workout is better.
Stairs – Climbing stairs or bleachers definitely helps as there are numerous steps on Bright Angel trail especially on the switchbacks
Hikes – Weekly longer hikes that ranges up to 6000 ft in elevation. Training in sun /any other form of heat training helps a great deal as well. Also helpful to mimic the hikes that are similar to this where you go down first and then climb up later. For SF Bay Area locals, an example would be going to the summit of Mt Diablo, hiking down and going back up. Same with Mt Tamalpais, where you can hike down from East Peak summit to Stinson Beach and then climb up.
Gear and what to bring on the hike
Pack whatever is absolutely essential and nothing extra on this hike!
Ten essentials – To start with, make sure to carry the ten essentials needed for hiking like sunscreen, wide brimmed hat, whistle, and first aid kit.
Clothing – This is one hike that requires various pieces of clothing to accommodate the weather patterns that changes throughout the day. So recommended to go with the three-layers, a base layer, a fleece, and a waterproof outer shell. Cotton is recommended in this hike which soaks up the sweat and gives some much needed cooling. Check the weather the week before your hike and pack accordingly.
Shoes – Hiking shoes or trail runners that are well broken into. We went with trail runners as they provide more breathability and are lightweight.
Bandana/cooling towels – These help to cool down by soaking in the creeks/taps and wearing over neck/head.
Water – We carried about 2L of water and a bottle of electrolyte throughout and kept refilling in every rest area. Sometimes the pipes break. Check at NPS site the day before and decide how much to carry.
Food – Electrolytes!! Whatever food you feel comfortable and don’t try anything new on the trail. We carried calorie dense foods like Gu Gels, nuts, almond butter, bagels, and rotis. Also took salt pills in regular intervals. Pickle juice helps with cramping.
Poles and Headlamps – Poles definitely do come in handy and you would need the headlamp when you start or finish the hike in the dark.
Miscellaneous – Mosquito net hoody, toe and hand warmers.
Day pack – A day pack to carry them all. Osprey Talon is my faithful companion as always!
Pls refer to a comprehensive list on my Mt Whitney hike blog post.
Conclusion
This is a wonderful bucket-list hike and we saw people of all ages do it but something not to be taken lightly. Plan for it and train for it diligently before attempting it. The quote “There will never be a photograph of the Grand Canyon that can adequately describe its depth, breadth, and true beauty” is quite apt. You need to be there to see and feel it. It sure will be a memorable one like it was for us!
Check out my other blogs at Trails and Summits. Happy Hiking!!
Anitha, you have inspired me to do this! This blog will definitely be my go to source for planning it! Thanks for sharing your experience with us!
Thank you, Kavita! Go for it 👍🏽
I have been to the south rim and in sept, the north rim. Not the hike, but that is on my bucket list. Thanking for sharing.
Comments are closed.