“It’s not the mountain we conquer, but ourselves”
— Sir Edmund Hillary
When I decided to do the Mt Whitney hike, I didn’t see as much information on where to train for it for someone living in San Francisco Bay Area. Most of the articles and training plans talked about doing high altitude practice hikes on the mountains in Southern California like Mt Baldy or elsewhere in the country. So I came up with this blog to share with you all my experience on doing this memorable hike with some tips that you may find useful in planning your trip.
Quick links for easy navigation:
About Mt Whitney Trail
About Mt Whitney Hike
Training hikes in Bay Area and beyond
What to bring on the hike
Some useful links to help with planning
Why Mt Whitney
It all started about four years back when one of my colleagues, who is an avid outdoor enthusiast, threw in the idea of hiking Mt Whitney as part of our company’s annual outdoor event. That got me started to learn about the mighty mountain, the tallest in the mainland USA at 14,505 ft and how it is many a hiker’s bucket list item. But unfortunately the plan didn’t materialize due to the logistics involved and I had to put it on the back burner.
Lately with the pandemic and everyone trying out different things, I renewed my dream of hiking Mt Whitney and applied for the permit in Feb of this year but to my disappointment it got rejected. But the rejection email I got also mentioned how I may have a second chance when they release the unclaimed permits to everyone on May 1st. This time around I had luck on my side and was able to secure permits during the first week of July.
With less than two months to go, anxiety started to set in slowly thinking if it is enough time for me to prepare for this epic hike. Even though I have been fairly active and running/hiking are part of my regular lifestyle, the thought of doing something of this magnitude and that too in a single day was no doubt a bit daunting. Every single article I read on this hike talked about the harsh alpine weather patterns on the mountain, the need for acclimatization, and how even the fittest fail to summit due to altitude sickness. But with the permits in my hand, there was no looking back for me and backed up by the incredible weather on that day, I successfully summited the majestic Mt Whitney.
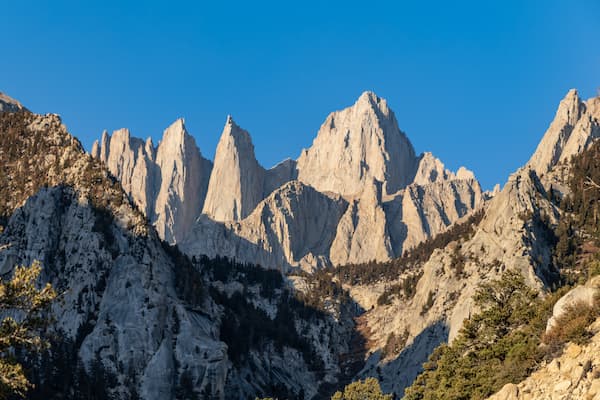
About Mt Whitney trail
Mt Whitney and Whitney zone come under the Inyo National Forest wilderness area. There are different trails to summit Mt Whitney but here I will talk about the most popular of them all, the classic Mt Whitney Trail from Whitney Portal trailhead. Hiking up to Mt Whitney requires securing a permit which is based on the lottery system and it comes with two options, a single use day permit or an overnight backpacker’s permit. I went with the first one. This link also talks about when to apply for the lottery, the dates when a permit is required, cost of permits, group size, etc. It’s recommended to do the hike during the July to September timeframe when there is less probability of snow and ice on the trail.
Starting at Whitney Portal trailhead, the trail goes past Lone Pine Lake, Outpost Camp, Mirror Lake, Trail Camp, Trail Crest, John Muir Trail cutoff, and finally the summit.
Trail: Mt Whitney Trail
Total distance: 20.9 miles out and back
Average time to hike: 12 to 16 hours
Elevation at trailhead: 8400 feet
Total elevation: 14505 feet
Net elevation gain: 6960 feet
Difficulty: Strenuous

About Mt Whitney hike
We had the permit secured for a Monday. So we reached Lone Pine, a small town, also known as the Gateway to Mt Whitney on Saturday morning where we stayed at Best Western Frontier hotel. That very afternoon, to get acclimatized, we drove up to Horseshoe meadow area which was at an elevation of about 10,000 ft and did a short hike from Cottonwood trail pass.
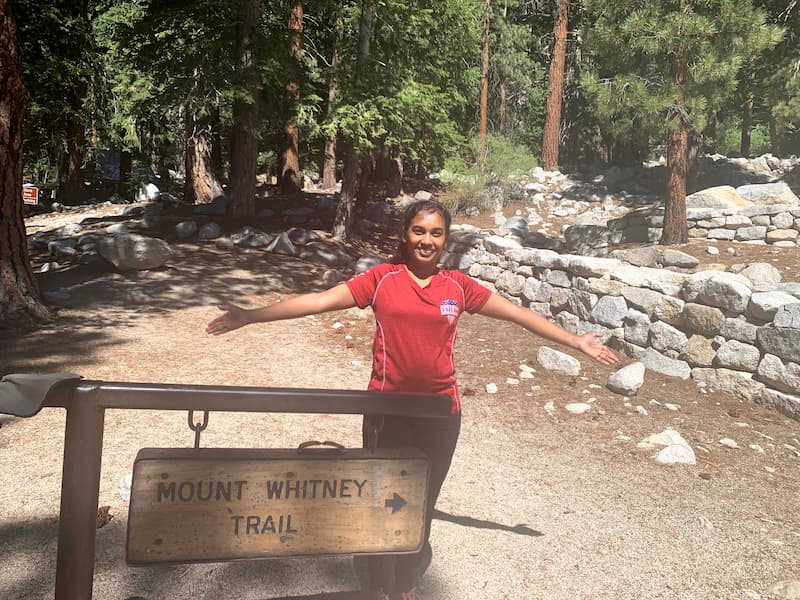
The next morning we went to the Whitney Portal which is less than 30 minute drive from Lone Pine, and it was finally good to be in that place that I had been researching about for so many weeks prior to that day. The portal was so picturesque with waterfalls, a pond, and buzzed with hikers and visitors alike.

We decided to take a short hike up the Mt Whitney trail to familiarize ourselves which we would be hiking later that night in the dark and we were glad we did. Up until the Lone Pine lake area, there is no need for a permit. While there, we treated ourselves to the famous burger at the Whitney Portal store and I must say that it lived up to all the hype.
Back at the hotel, we tried to sleep as much as we could anticipating the long day on the trail the following day. I can’t stress how important it is to get that sleep in to get yourself up to the summit the next day without getting fatigued as much. Feeling refreshed and after a good dinner, filled with excitement, we headed to the Portal area just before midnight. Though expected, we were a bit surprised to see there was not a single source of light in that area which by the way is home to a lot of black bears.
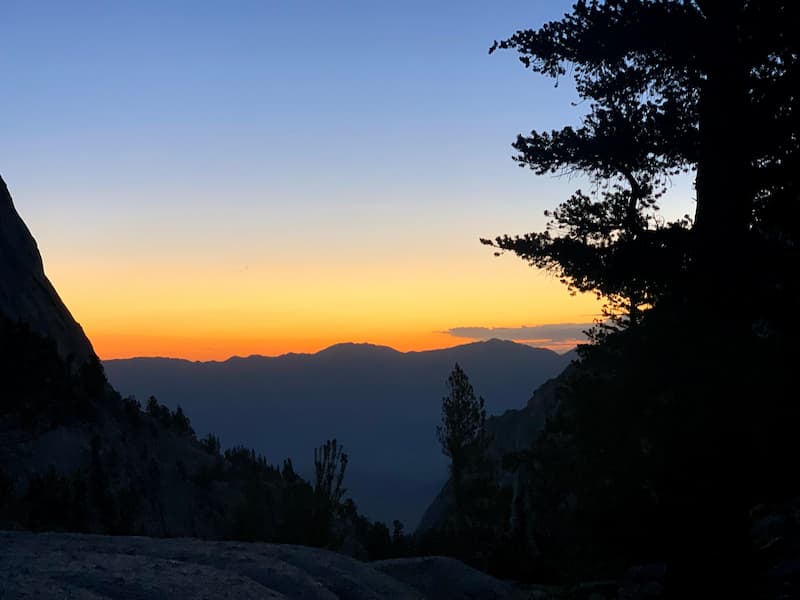
Shortly after midnight, we set our foot on the Mt Whitney Trail after weighing our carefully packed day packs in the weighing scale at the entrance. We also picked up the wag bags as there are no restrooms along the trail and all visitors are expected to pack out their human waste. The weather was quite pleasant and soon we got used to the darkness enveloping us, soothed by the sounds of creeks and waterfalls all the way up to the Outpost Camp at about 4 miles, making the hike quite enjoyable. We got to chat with a few fellow hikers who we ran into occasionally.

We made sure to maintain a slow pace and not rush up to deal with altitude sickness. We also kept hydrating ourselves and took a bite every now and then even though there wasn’t much appetite. From Outpost Camp the trail started getting rocky and we were slowly getting out of the tree cover witnessing the beautiful sunrise which was quite breathtaking.
It was one of the most beautiful trails I had ever hiked, strewn with more scenic wonders along the way like the Mirror Lake, Consultation Lake, and Trail meadows with streams amid lush greenery and finally the Trail Camp at 6 miles where backpackers had set up tents. Just before the Trail Camp we refilled water in the streams and it tasted so good!

After taking a short break, we continued with the hike up the much heard and read about switchbacks, ninety-nine of them in total, still in good spirits and having chit chats with fellow hikers. Luckily there was not much snow on the trail anywhere on the switchbacks and in about a couple of hours, we reached the Trail Crest.
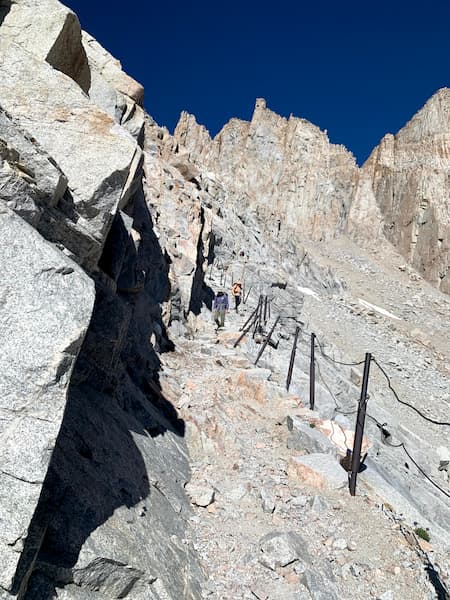
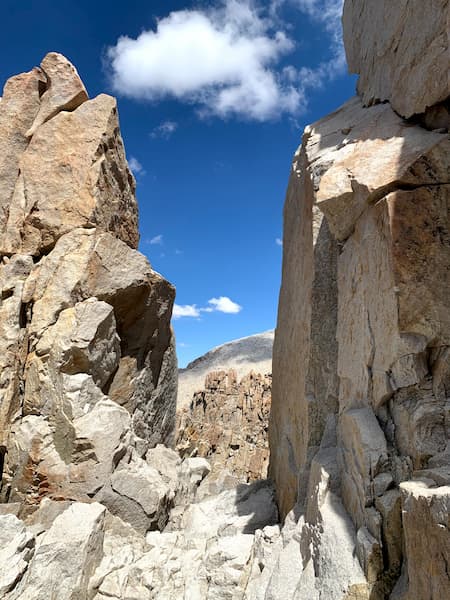
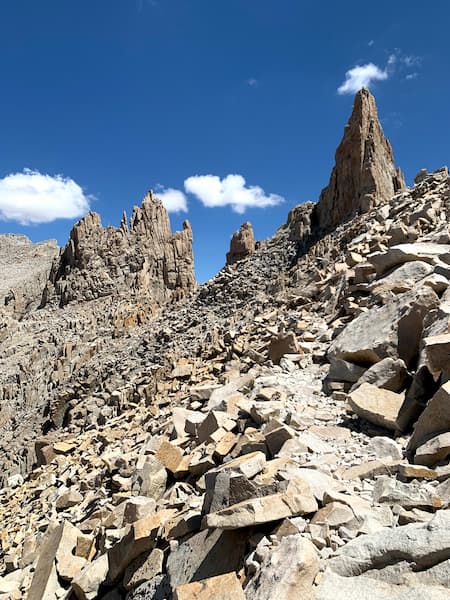
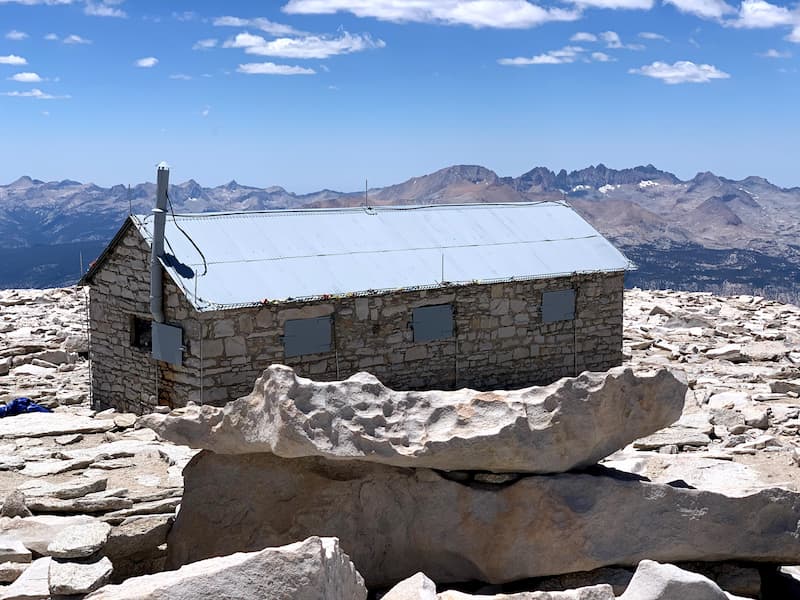
To me, from Trail Crest was the toughest part of the hike, having to navigate the rocky boulders in spite of the incredible views of the massive Sierra range on the other side across the guitar lake. This is where the John Muir Trail cut-off is and we were careful to follow the directions to Mt Whitney summit. The 2.5 miles up to the summit going past breathtaking drop-offs called the “Windows” seemed like a never ending ordeal with the Smithsonian hut far out of reach.
With the jagged peaks hovering over, we had to pay careful attention to every step we took and that made this stretch of the hike even more harder. In addition to watching the steps, we had to keep an eye on the clouds also to make sure there are no thunderstorms or lightning, which is a very common occurrence on the mountain top prompting many to summit before noon. To be honest, we really got lucky in hiking Mt Whitney on such a beautiful day with clear blue skies and not having to worry about lightning strikes.
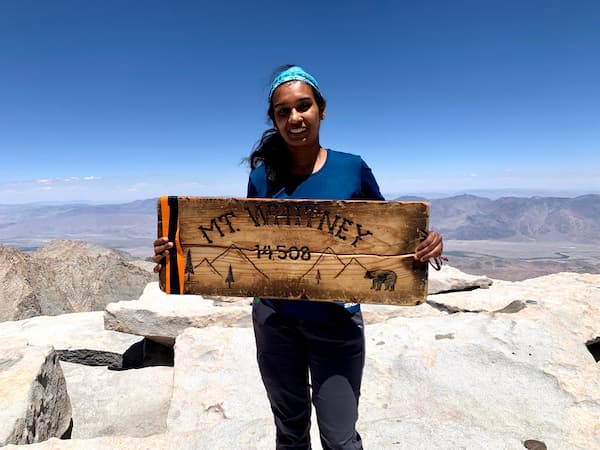
The fellow hikers were very helpful, providing the much needed motivation, and constantly checking on each other which was quite comforting. In another couple of hours, we finally made it to the summit to a cheerful welcome and there are no words to describe that feeling of accomplishment. After taking some pictures and signing the guestbook, we started heading back the same way we went up witnessing the incredible landscape in a different light.

It took about seven hours to get back to the Whitney Portal. After sunset, there were barely anyone on the trail heading back to the portal. You may want to keep this in mind and plan on getting back to portal at a decent time before it gets too dark.
Training hikes in Bay Area and beyond
Even though it is intimidating to think about hiking 21 miles in a single day at such a high elevation, it is very doable with proper training. There are many ways to train for this hike based on where you live from doing practice hikes on tall mountains to training entirely on a treadmill. Doing strengthening exercises that targets the whole body is as important as doing the practice hikes. This is called an epic hike for a certain reason. So keep that in mind when you train for it.
Living in the bay area where we don’t have access to high altitude mountains to train, it was a bit of a challenge to figure out how the body is going to handle the peaks of Mt Whitney. The one that I frequently came across in the bay area was Mt Diablo at 4000 ft elevation which is still a good one to train but definitely didn’t help gauge if my body can deal with the probable altitude sickness which is a common ailment for many in hiking Mt Whitney.
So based on recommendations from friends, here are some trails where I did my training hikes not necessarily in any particular order. Some of them are as far as in Yosemite and Sierra Nevada that requires quite some amount of driving, but now looking back, it was well worth it because those hikes are the ones that actually gave me the much needed confidence to hike the majestic Mt Whitney.
Bay Area trails – There are many trails in the bay area within 4000 feet elevation to practice and here I have listed some which I found useful before progressing to high altitude ones.
Mission Peak loop from Stanford Staging area (5.8 miles, 2135 feet elevation gain)
Mission Peak loop from Ohlone College (7.3 miles, 2145 feet elevation gain)
The above two could be combined and done back to back for added endurance
Black Mountain in Rancho San Antonio Open Space Preserve (11.2 miles, 3146 feet elevation gain)
From Black Mountain, Rhus Ridge trail can be added for an extra 8 miles to make this hike mimic the Mt Whitney hike distance wise.
Mt Diablo summit via Mitchell Canyon loop (13.0 miles, 3822 feet elevation gain)
Trails in Yosemite/Sierra Nevada – These are high elevation hikes (greater than 8000 feet) compared to the ones in the bay area. They can be done as day trips by leaving very early in the morning from the bay area but I would recommend going a day ahead to get acclimatized and well rested as most of these are ranked as strenuous. Poles are highly recommended because they have rocky terrains as we get closer to the summit.
Alta Peak Trail in Sequoia-Kings Canyon National Park (14.9 miles, 4064 feet elevation gain)
With a starting elevation 7280 feet at the trailhead and the peak at 11200 feet, this would be a good one to start with the high elevation hikes. We stayed at Three Rivers the night before the hike.
Mt Dana Summit Trail (7 miles, 3103 feet elevation gain)
Mt Dana is not a very long hike but it starts at an elevation of approx 10,000 feet and goes up to 13,000 ft and because it is close to Mt Whitney in elevation, this is an ideal one to see how our body reacts to high altitudes. Closer to Tioga Pass entrance of Yosemite NP, Lee Vining is a good place to stay to get acclimatized before doing this hike.
Cloud’s Rest Trail (13.4miles, 3000 feet elevation gain). With a starting elevation at 8150 feet, this is considered one of the popular hikes in Yosemite.
Half Dome Trail (16.3 miles, 5318 feet elevation gain)
One of the most popular hikes, an epic one on its own, the top of the dome is at 8,839 feet elevation. Permit is required to climb the dome but not needed to use the trail itself.
What to bring on the hike
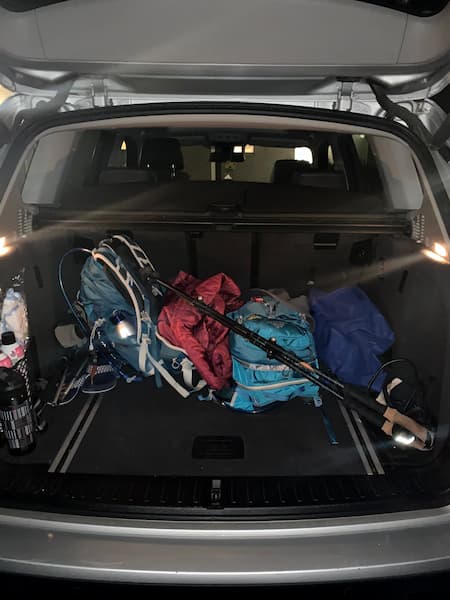
Even though I had done quite a few hikes in the past, I never had carried anything more than ten pounds and most of the weight is from water. With Mt Whitney, it’s a whole different game! I spent quite a lot of time educating myself about the different gear, nutrition, what and how often to eat, the absolute essentials, and what to wear. This is what I packed for a summer hike and by the end of the day felt quite satisfied about how everything worked out well and not having forgotten anything.
Ten essentials – To start with, make sure to carry the ten essentials needed for hiking like sunscreen, hat, whistle, emergency blankets and first aid kit.
Daypack – There are many options available like Deuter, Gregory, REI, and I went with Osprey Talon 22L pack (women specific version is Tempest 20L). Talon is still considered a unisex pack. When it comes to packs, the fit matters. So go to your local sports store and get it fitted before actually buying one.
Hydration bladder – I carried a Camelbak Crux hydration reservoir 3L and two half liter bottles filled with electrolytes. There are some posts that suggest carrying less water to start with and refill along the way but I decided to carry 4L all the time.
Water filter – This is to refill water from the streams along the trail. The no fuss Sawyer mini filters are lightweight and compact.
Poles – The lightweight and foldable Blackdiamond trekking poles really helped me on this long hike as well as on my training hikes and saved my knees especially on the switchbacks and the final stretch to the summit and back.
Hiking/trail running shoes – I have quite a few pairs but lately Hoka Speedgoat has become my most favorite due to the maximum cushion and support it provides, especially on rocky terrains. I used it with toe cushions and Smartwool socks to keep my feet dry and stay blister free. Bring a couple of extra pairs of socks for the much needed comfort they provide when you switch to a fresh pair during your hike.
Headlamps – Many start this hike at midnight to summit before noon and it’s an absolute must to have a headlamp to navigate the trail in the dark. I like the Petzl lamps that come in different models and it’s good to go with one where you can change the batteries and yes, don’t forget to pack the batteries as well because you may need them while coming back also.
Mosquito head nets – These were quite useful especially when we started the hike at midnight and it helped not having to constantly shoo away the bugs while carrying the poles at the same time.
Phone/chargers – Most of us use our GPS in phones to navigate the trail and of course to capture the memories. So good to carry a power bank/solar charger for the charge in your phone to last for the entire duration of your hike.
Maps/GPS – I downloaded All Trails Mt Whitney Trail map and it was just perfect. It is fairly an easy out and back trail to navigate except in places where the terrain gets rocky and the trail becomes faint. It’s extremely important to have the maps downloaded and have it ready for offline use because you may not have the internet connection at all times. Additionally, I also had the Mt Whitney/Lone Pine area Google maps downloaded for offline navigation. If new to these apps, practice using them during your training hikes.
Outerwear – It’s entirely based on the weather but in general, a fleece or a down jacket for the summit, a lightweight jacket or windbreaker like Patagonia Houdini, and a rain jacket.
Pants – The highly recommended Columbia Saturday Trail pants and the Prana Halle pants worked well during all my hikes and helped me move easily with enough room to wear my knee braces. Prana might be uncomfortable for hot summer hikes but it worked well in early July when it was not very hot still.
Tops – As always with any of the hikes, layering is good especially at Mt Whitney where the weather patterns changes drastically. Any moisture wicking shirt preferably with UV protection works well. It also depends on when you go. One of my favorites is Patagonia Capilene daily cool shirts.
Miscellaneous – Wet wipes, micro spikes if there is snow on the trails, sanitizer, beanie/hat, gloves, Buff head/neck wear. In addition, I would pack a small hand towel, which helped to dry off the feet after soaking in the streams.
Tip: Pack travel size items if possible to reduce the weight you carry. e.g. sunscreen, sanitizer, wet wipes
Altitude sickness medication – Any article on Mt Whitney talks about acclimatization and how some fail to summit due to altitude sickness. As suggested in different forums, I consulted my doctor and got the altitude medication Diamox. It cannot be bought over the counter. Also I carried ibuprofen though I didn’t have the need to use it.
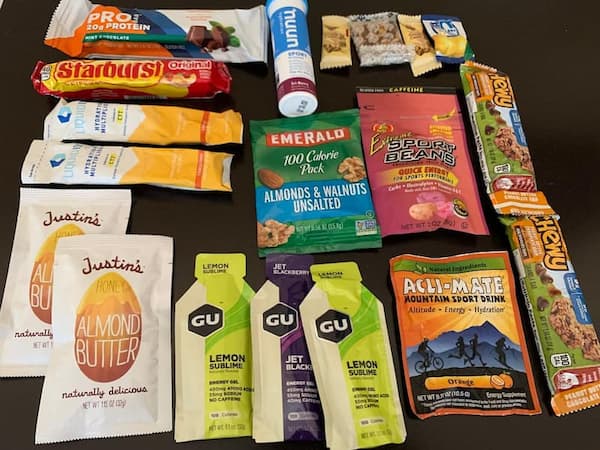
Food/snacks – I planned on consuming something every hour of the hike. Even though I didn’t have the appetite and used only part of what I took, I felt comfortable having enough items to last me through the day. It’s important to not try anything new on the trail for the first time. The food choice greatly depends on the individual’s preference. So practice during your training hikes to see what works for you. It’s important you carry at least 3L to 4L from Trail Camp all the way up to the summit and back because there are no good water sources after that point.
Some of the items I packed are GU gels, Justin’s Almond butter, Starburst/M&Ms, a few lemon and ginger candies, a fruit, bagel sandwich, rotis/tortillas, trail mix, energy bars, and Cliff Bloks.
Electrolytes – Gatorade, Vita Coco coconut water, Liquid I.V., Salt Stiks
Useful Links
I joined couple of active Facebook groups which were quite useful and helped a great deal with my planning the trip.
Mt Whitney Forum is another good one where lot of discussion goes on regarding the current weather conditions and we get to see the live trip reports
Inyo National Forest website is where we get official information on events like fire, road closures, applying for permits, permit pick up, etc.
Enjoy planning and training for your hike and let me know if you have any questions. I will be happy to help! Comments and feedback are welcome. Thank you!!
Check out my other blogs at Trails and Summits. Happy Hiking!!
Thank you for detail description of the hike, trails, food items, clothing, distance and example of other hikes to prepare for the Mt. Whitney
You are welcome!
Comments are closed.